Guides
How To Install The 3DO FZ-1 Door Brackets
This guide will walk you through installing our Panasonic 3DO FZ-1 Door Brackets for people with Mnemo’s 3DO ODE installed. As you may or may not know, when you install Mnemo’s 3DO ODE you end up removing the CD-ROM drive which holds the drive door in place. These brackets add support for the door so it doesn’t fall off your 3DO FZ-1. This guide assumes you’ve already disassembled and removed the door from your 3DO’s CD-ROM.
Disclaimer: This post was written for informational purposes only. I assume no liability or responsibility for damaged equipment or for any injury you may incur attempting to replicate this guide.
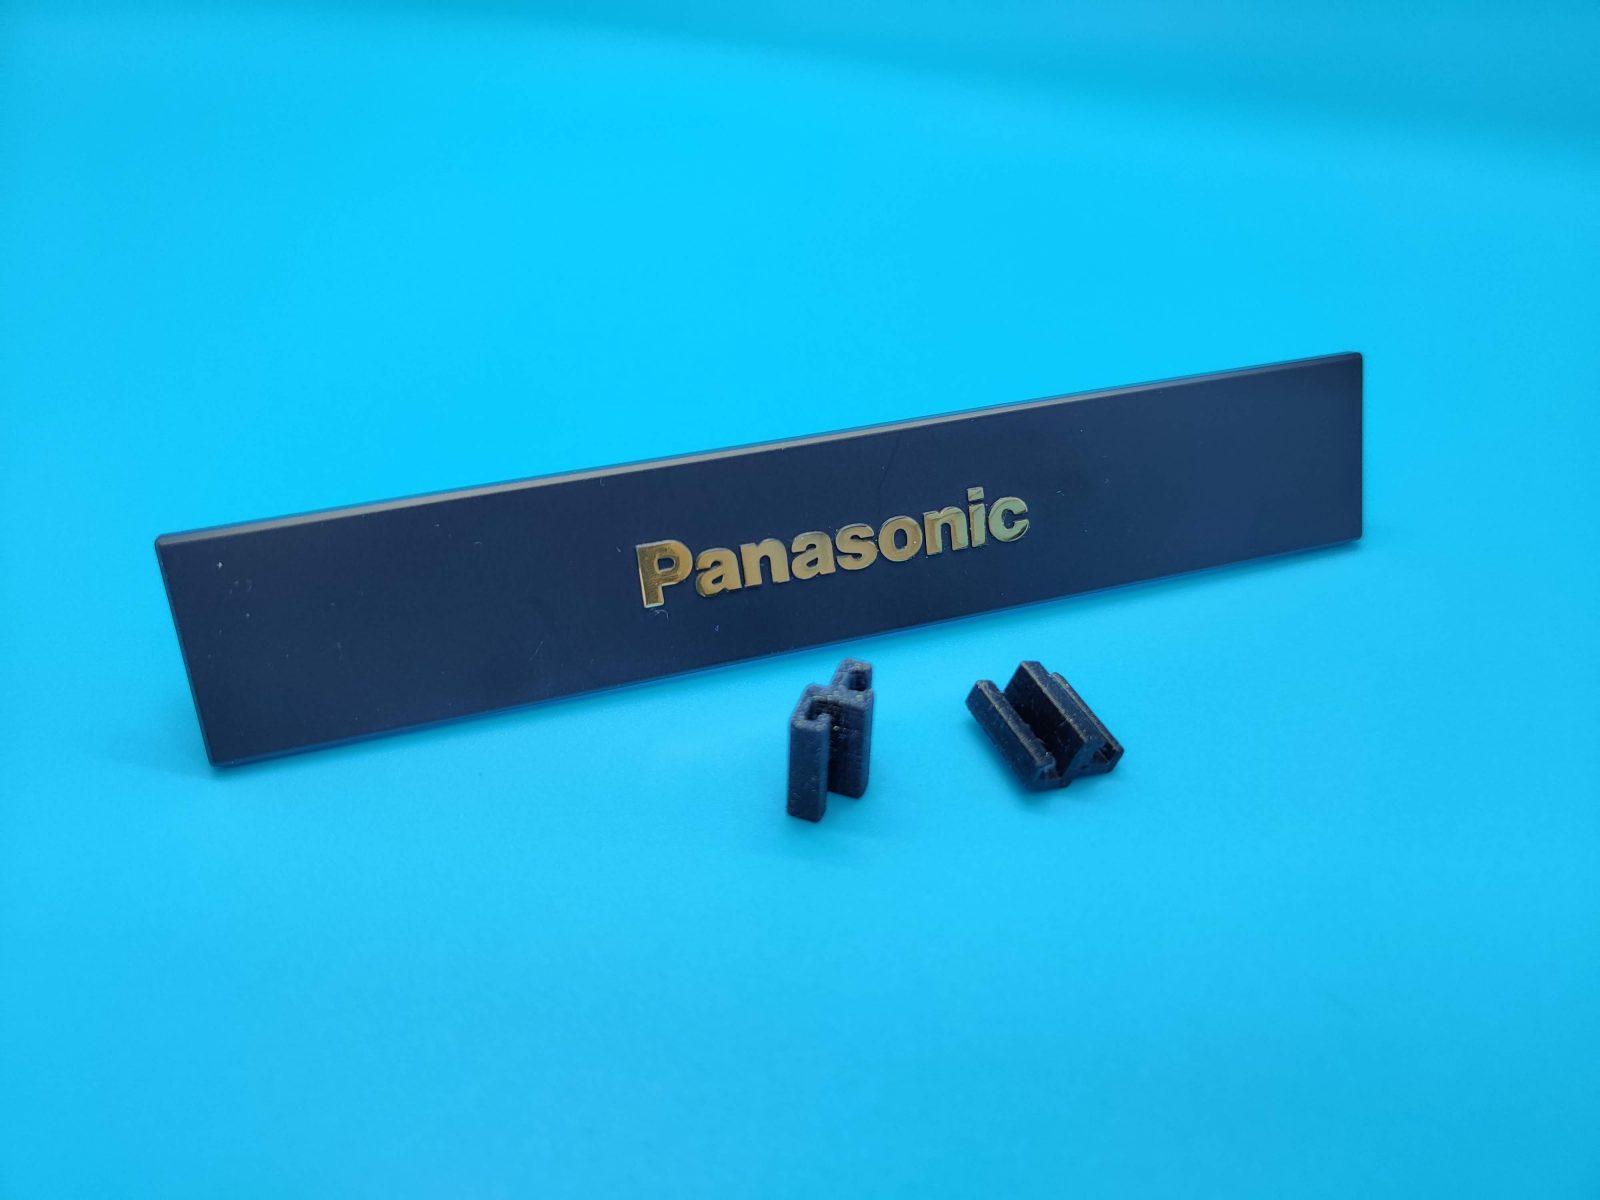
Panasonic 3DO FZ-1 Door Brackets
These simple brackets hold your FZ1 3DO’s CD-ROM drive door to the top shell.
Order at Stone Age Gamer:

Understanding The Brackets And How They Fit Onto The 3DO FZ-1
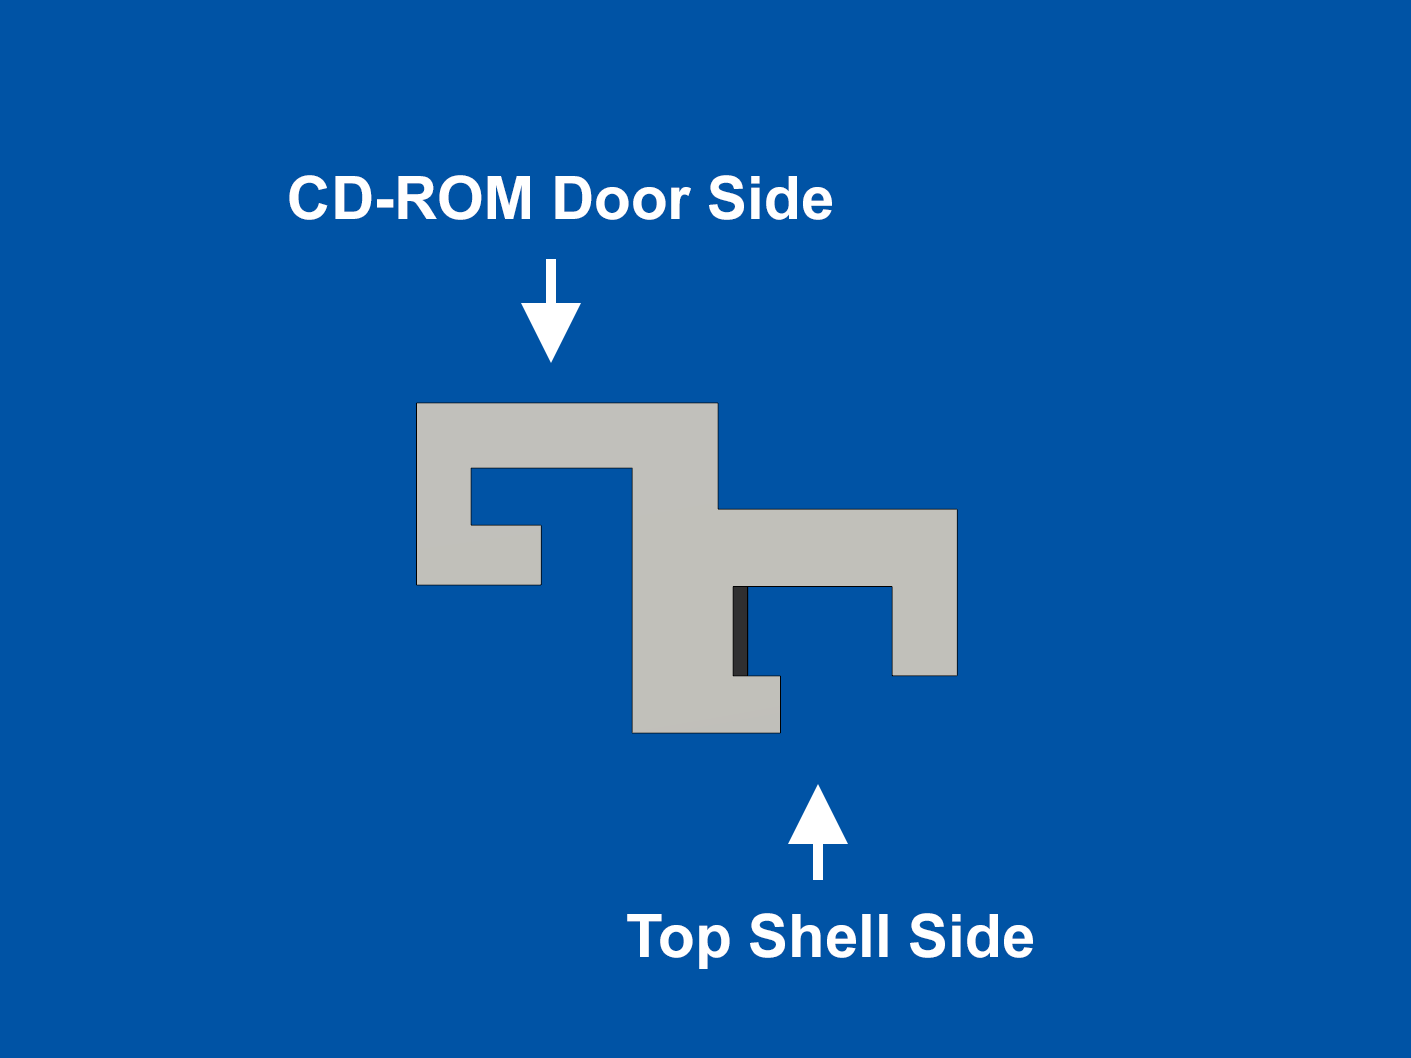
Bracket openings
There are two openings on the door brackets. Each opening is meant to slide over the 3DO’s top shell and CD-Rom door. The easiest way to tell which is which is to look straight down on the bracket. The larger opening is meant for the 3DO’s top shel and the small opening is meant for the CD-ROM door.

The brackets are directional
The 3DO FZ-1 top shell door opening is curved upwards at a slight angle. This means there’s a bracket meant for the left side and a bracket meant for the right side. This can be hard to tell since these brackets are so small but I ship all my brackets with markings letting people know which is which. If that fails and you accidentally mix them up, that’s ok. The picture shows an angled wall highlighted in red. The Top Shell start at the base narrower and then becomes wider. The correct bracket will be the opposite at its base.

Example of how brackets should look once installed
Brackets should be labeled “L” for the left side bracket and “R” for the right side bracket. Obviously, this is reversed when installing them since you’re most likely look at the top of the 3DO shell upside down. Use the picture as a reference.
Installing The Brackets Onto the 3DO FZ-1

Install the brackets onto the CD-Rom Door
- Install the correct side bracket on each side of the CD-Rom door by pushing the bracket onto the frame as shown in the reference picture. This can be a tight fit.
- The bracket should be pushed until it’s flush with the CD-Rom door’s frame.

Install the door onto the 3DO FZ-1 top shell
- With the brackets installed on the correct sides of the 3DO FZ-1 CD-Rom door, push the door and brackets onto the 3DO top shell.
- How far “up” the top shell you push the door is completely subjective. I prefer the bottom of the CD-Rom door to be flush with the bottom of the top shell.

The CD-Rom door bracket is now installed
Your 3DO FZ-1’s CD-Rom door is now held into place without the CD-Rom drive or glue. Reassemble your 3DO and enjoy!