Dreamcast Mods That Will Modernize And Extend It’s Life
Posted on July 18, 2020
The Sega Dreamcast was released on 9/9/99. That’s 20 yrs and 10 months ago as of the writing of this article. There are two primary issues retro console gamers typically deal with in modern times: failing hardware components and the difficultly of getting a decent picture out of an HDTV or 4k TV. As a retro game lover and electronics enthusiast, I have made it my own personal mission to extend the life of these aging consoles and show you how you can too. Let’s look at several Dreamcast mods that will modernize and extend it’s life!
Table of Contents
- GDEMU (Optical Drive Emulator or ODE) With 12v Rail Removed
- Noctua Fan upgrade
- Real Time Clock (RTC) battery upgrade
- Controller port fuse upgrade
- DC Digital (DC HDMI)
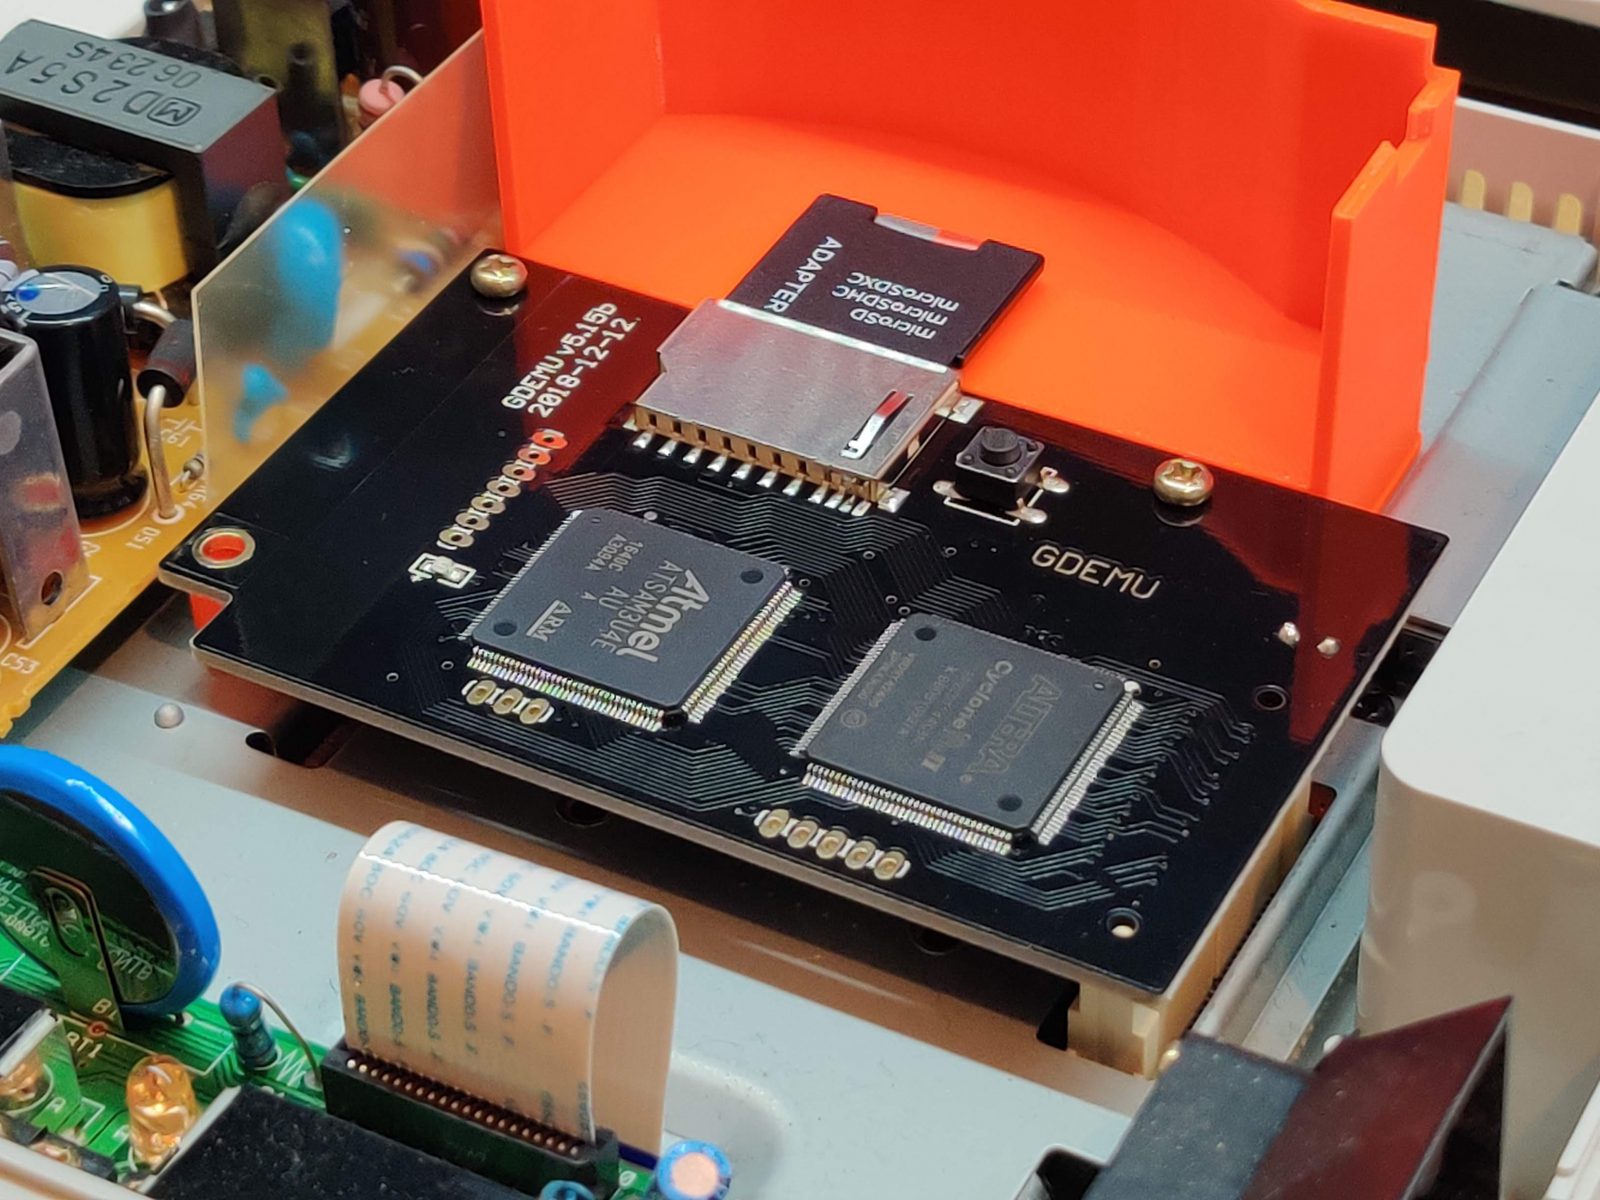
GDEMU (Optical Drive Emulator or ODE) Install With 12v Rail Removed

One of the best upgrades you can do for older disc based consoles is an Optical Drive Emulator (ODE) install. This allows you to replace an optical drive with an SD card or even USB hard drive. This is a great way to store your complete game library in one digital format. It also allows you to preserve your cases and discs from wear and tear. The Dreamcast has a few ODEs on the market. I chose a cloned GDEMU for the sole reason of availability. I would rather have purchased the original GDEMU but the creator only randomly opens pre-orders and they sell out fairly quickly. There’s also a USB-GDROM from another developer who goes by “Mnemo”. It’s worth noting that he also has ODEs for the FZ-1, FZ-10, and GoldStar 3DOs.
Noctua Fan upgrade

Another relatively simple upgrade for the Dreamcast is the Noctua NF-A4x10 5V fan mod. This little 40mm fan moves a good amount of air while staying almost silent, especially compared to the original OEM fan. I don’t really remember how loud the Dreamcast’s fan was when it first came but over the years mine has gotten loud enough to be a constant annoyance. Here’s a quick comparison video demonstrating the very audible difference between the OEM and Noctua fan:
Because the Noctua is a bit bigger than the OEM fan, you’ll need to find a way to mount the fan to the case and adjust the case lid catch. I used custom 3D printed parts from RetroRGB to solve this.
Real Time Clock (RTC) Battery Upgrade

How many times have you booted up your Dreamcast only to hear an annoying beep followed by the date / time screen? That’s because the onboard rechargeable battery has died. Unlike the Sega Saturn, the Dreamcast uses a soldered in rechargeable style battery. This was actually great back when the battery was among the living because it meant we didn’t have to constantly replace the CR2032 battery. Like all components, this battery was not meant to last forever. In fact, if left in place it could eventually leak all over the controller board causing corrosive damage, so it’s gotta go. The next best solution is to replace the rechargeable battery with a non-rechargeable CR2032 coin battery. They’re inexpensive and widely used and yes it’s the same battery used in the Sega Saturn’s SRAM / Real Time Clock.
Controller Port Fuse Upgrade

This next mod was purely for future proofing my Dreamcast to ensure no controller problems in the years to come. The original fuse on the controller board would occasionally blow when a user repeatably plugs a controller into the ports, causing the fuse to trip. Unfortunately, this fuse was a one and done type of fuse, leaving your Dreamcast broken until you replace the component. The solution to this problem is simple: upgrade the fuse with a reset fuse, which can literally be “reset” with a power cycle. It’s a simple mod and if you’re already replacing the battery on the board, you might as well do this too!
DCDigital (DC HDMI)

I’ve saved the best for last, the DCDigital or DC HDMI mod. This modification gives you digital to digital video signal for pixel perfect HDMI out from your Dreamcast in sweet 1080p. This mod a magical thing to see in person. The pictures I’ve posted below are cell phone photos and don’t do this mod justice. The DCDigital also allows you to enable scanlines as well as update the firmware via Wifi for future features and bug fixes. This is literally the best thing to happen to the Dreamcast since it’s release, I can’t stress enough how amazing it is. It is definitely an higher level install so if you’re not savvy with a soldering iron, it would be wise to hire someone who is.
There is one major disadvantage to note about upgrading any retro console to HDMI and that’s the lack of light-gun game support. So no House of the Dead 2 or Confidential Mission support. Luckily, you can still use Composite and S-Video cables if you own an old CRT TV.
You can purchase the DCDigital here
Conclusion
And that’s it! I am completely satisfied with these modifications and how they turned out. If you’re a Sega Dreamcast fan, I highly suggest these Dreamcast mods to modernize and extend it’s life for years to come.


